No game reports this week. Just some progress on my Flames of War US list.
I opened my box of Battlefront 105mm artillery. There are lots of components to this unit! There are four guns with custom bases and five figures to go with each gun, a custom base for the artillery command team, one stand for the observer, one stand for the HQ team, and one jeep. My list includes a second jeep for some reason. Luckily, I have an extra jeep already base coated.
The guns are metal and in spite of the good packaging, they were badly bent and needed to be straightened into place. I stumbled on a good trick of placing the guns on the grid of my craft mat and using the grid as a reference. This helped tremendously.
I base coated the guns and jeeps with Vallejo Brown-Violet, the un-official "green" of the US Army. And I used the handy Testor's spray paint kit. This really saved some time.
The custom bases were resin. I had never worked with resin before so I primed it just to be sure. The bases are full of character and lots of boxes of the ammunition. I Googled a great WWII photo of two soldiers holding munitions with the label "Easter Eggs for Hitler" painted on them. I love the photo and will try to integrate that message on the models somehow.
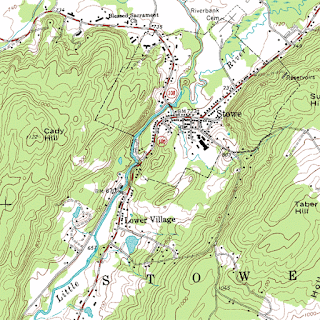
The artillery HQ base included a makeshift table with an obvious space for maps to be placed on it. I found an typical terrain map on Wikipedia, shrunk it down to 1/100th scale, printed it, and glued it to the table. From two feet away, it makes a convincing little map.
Next step is to paint the troops, then jeeps, then paint the bases since the bases are actually modeled already.
I opened my box of Battlefront 105mm artillery. There are lots of components to this unit! There are four guns with custom bases and five figures to go with each gun, a custom base for the artillery command team, one stand for the observer, one stand for the HQ team, and one jeep. My list includes a second jeep for some reason. Luckily, I have an extra jeep already base coated.
The guns are metal and in spite of the good packaging, they were badly bent and needed to be straightened into place. I stumbled on a good trick of placing the guns on the grid of my craft mat and using the grid as a reference. This helped tremendously.
I base coated the guns and jeeps with Vallejo Brown-Violet, the un-official "green" of the US Army. And I used the handy Testor's spray paint kit. This really saved some time.
The custom bases were resin. I had never worked with resin before so I primed it just to be sure. The bases are full of character and lots of boxes of the ammunition. I Googled a great WWII photo of two soldiers holding munitions with the label "Easter Eggs for Hitler" painted on them. I love the photo and will try to integrate that message on the models somehow.
The artillery HQ base included a makeshift table with an obvious space for maps to be placed on it. I found an typical terrain map on Wikipedia, shrunk it down to 1/100th scale, printed it, and glued it to the table. From two feet away, it makes a convincing little map.
 |
| Map from Wikipedia |
Next step is to paint the troops, then jeeps, then paint the bases since the bases are actually modeled already.
 |
| Artillery after applying the wash |


Comments
Post a Comment